Monday, September 24, 2012

Mason Jar Mummy

Here is a fun little Halloween project that is very easy to create.  
Materials Needed:

Mason Jar
Bandage Roll
Hot Glue
Scissors
Googly Eyes
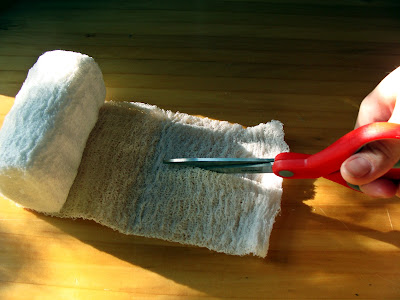
 I found the bandage roll at Walmart for a couple dollars.  It was a little too wide so I ended up cutting it in half.  
 I started at the top of the jar and hot glued the bandage around the inside rim.  I suggest if you use a real tea light candle to NOT put the bandage on the inside.  I always use the battery operated candles.  
The next step is to keep twisting the bandage around the jar and adding dabs of hot glue to hold the bandage on.  Keep doing this until you reach the bottom, then hot glue the end of the bandage under the jar.  The last step is to glue two cute little googly eyes on.
Here's the little mummy all lit up for Halloween

 Isn't he adorable!

Tuesday, May 8, 2012

Paper Mache Robin

I made this cute little Robin over the weekend.  The body is made out of paper mache.  The wings are pieces of cardstock painted and hot glued on.  And for the legs I used paper clips.  It is painted with indoor/outdoor acrylic craft paint.
You can find the recipe for paper mache paste here:
http://dahlhartlane.blogspot.com/2011/09/how-to-make-paper-mache-paste.html


Here she is sitting on her "eggs" (painted rocks)

Thursday, May 3, 2012

Branch Handled Outdoor Serving Tray

I just loved this branch handled tray by Funky Junk Interiors so I decided to try one for myself.  

Here's my version...
I hand painted the dandelions on with white indoor/outdoor acrylic craft paint.


And here's the tray in its new home on my picnic table...

Tuesday, May 1, 2012

Nautical Storage Box

 Here's another storage box made out of a cardboard box.  I made this one for my son's nautical themed room for storing stuff in his closet.  I used stiff burlap and trimmed it with rope.  I used a stencil for the anchor and just colored it in with a Sharpie.

Monday, April 30, 2012

Chicken Wire Memo Board/Key Holder

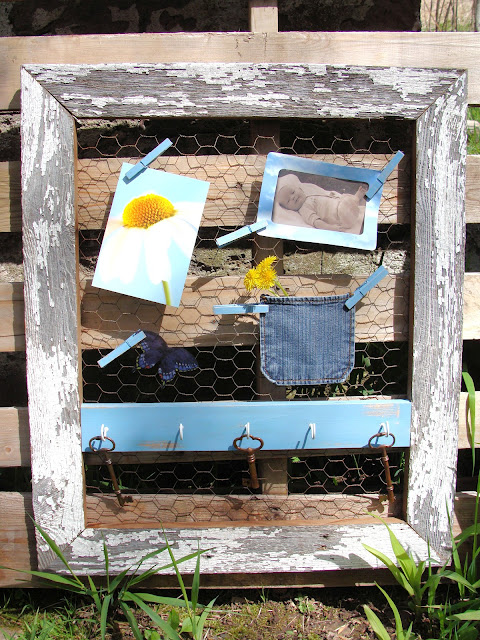
Here's my latest project, a chicken wire memo board/key holder.  It measures 24 inches wide by 28 inches tall. The frame is made out of old barn wood. The board with the key hooks is just a piece of scrap wood.  I painted and distressed it and screwed the hooks in.  Then used wood glue to secure it inside the frame.
I cut a pocket out of an old pair of jeans and stuck a few dandelions in it, so cute.
I had some skeleton keys that I hung on the hooks for decoration.
 I painted and distressed six clothespins for hanging photos or memos.


Friday, April 27, 2012

Rustic Dragonfly Birdhouse

I saw this cute little birdhouse on Pinterest.  It was for sale on Etsy by 
  • BirdhousesByMichele  .  She has some really amazing birdhouses!  But the price was way too high($75).  So I decided to make my own rustic dragonfly birdhouse with supplies I already had on hand(so mine was free!)
 This is what I came up with...

Front View

 I love the olive green and light gray combination of colors.  I also distressed it with sandpaper to give it that awesome rustic look.  

Rusted Dragonfly

Side View


Back View


Wednesday, April 25, 2012

Cardboard Box Made Into Cute Storage

This was a fun little project.  I've been seeing these storage boxes made out of simple cardboard boxes on Pinterest.  So I decided to try it out for myself.  I found some cute gray polka-dot fabric at a local thrift store.  And I had some pretty purple ribbon on hand to go with it.  
 The supplies I used:  a simple cardboard box, fabric, ribbon, scissors, hot glue gun, and a tape measure.  First I measured and cut four rectangle pieces, one for each side of the box.

 The next step was to hot glue the fabric onto the box.  I started by gluing the bottom edges then flipped the box over to glue the top.   I only put the fabric about two inches into the inside of the box because the box is going to be filled with stuff anyway.  No need to waste fabric.  
 Then I hot glued ribbon on each corner of the box and also ran the ribbon along the rim.
Start gluing the top ribbon at one corner of the box
 I think it turned out pretty good for my first try. 


Saturday, April 21, 2012

Driftwood and Burlap Sailboat

Yesterday I attempted to make a little driftwood sailboat for my sons new room.  First I found some driftwood pieces (1 stick-like piece for the mast and one larger piece for the hull).  I broke off about 1 1/2 inches off the stick piece to go on the side of the hull.  I drilled two holes, one on the top and one on the side of the hull.  The two sticks fit snugly inside the holes.  
 I tied some twine around the top of the mast, connecting one down to the smaller stick, the other just lay freely.  Then I took some stiff burlap (found at a local thrift store for $1/yard) and cut out two triangles for the sails.  I hot glued them to the top of the mast and then glued the twine on the edges of the sails.
 I was lucky to have found a driftwood stick that had a natural looking flag.  If I didn't I probably would  have made one out of scrapbook paper or a piece of fabric.

Thursday, March 29, 2012

More Easter Decor!

Easter is almost here and my house is looking pretty festive.  Yesterday I made these crackle eggs.  I used Rust-Oleum American Accents Crackle Creations spray paint.  I just took four cheap plastic eggs,  sprayed the black base coat on and left them sit for about an hour.  Then I sprayed the top coat on and they turned out pretty cool.  

  
I put some Spanish moss in a crate I made out of scrap wood.  The four eggs fit perfectly inside.  They almost look like real eggs.


 Here is my Easter tree this year.  I took some pussy willow branches and hung paper eggs all around.  The eggs are made with strips of paper glued on both ends then tied on with string.
Rustic Wooden Basket Easter Decor

Front Porch
Easter Decor
 Here is my front porch decorated with an old crate, barrel, pitch fork, pussy willows, barbed wire and a wooden basket(found at Goodwill) with plastic eggs and Spanish moss.  The Fresh Eggs sign I made out of drift wood.

Monday, March 19, 2012

Felt Board and Felt Pictures

I made this felt board for my son's newly remodeled room.  I found the cork board at a local thrift store for $1.50.  It measures 23 1/5 X 35 1/4 inches.  I bought a yard each of blue(sky) and green(grass) felt. 
 I stapled the blue on first and then cut the green in half to put over the blue.  I also glued the green on the front to keep it from coming off.

 To make the felt pictures you will need Mod Podge, a paint brush, felt pieces, and a photo/image.  I printed my pictures then Mod Podged them to the felt.  I also put a layer of Mod Podge over the image.


 Once the Mod Podge is dry you can cut around the images.
Add caption

SHAPES
 The shapes and the ABC's I just cut free hand.  I cut a little pond out of a dark blue felt sheet.  I also made some of the felt pieces(butterflies, farm animals, sailboat) out of stickers I had.  I just put the stickers on the felt and cut around them.